
How to Increase Pull-Up Strength Without a Gym
Simple progressions, honest technique cues, and two routines you can start today — at home or in the park. Real pull-ups, built anywhere.
The fastest way to increase pull-up strength without a gym is to combine banded pull-ups, ring rows, eccentric pull-ups, and consistent weekly practice 2–3 times per week while progressively reducing assistance over time. These four methods, applied with strict technique and adequate recovery, produce measurable rep increases in 4–6 weeks for most people.
- Beginners working toward their first strict pull-up
- Intermediate athletes stuck at 3–8 reps and plateauing
- Home and outdoor trainees without gym access
- People training with rings or resistance bands
- Anyone whose elbows or shoulders limit their current training
⚡ Quick summary
- A bar, rings, or a beam is all the equipment you need to build strong pull-ups
- Ring rows, eccentrics, banded reps, and isometrics are the four core methods
- Technique matters more than volume — active scapula, elbows in, full range
- Two 6-week programs included — minimal gear and rings focus
- Every plateau has a specific fix depending on where in the movement you stall
- Sleep and protein accelerate progress more than additional training days
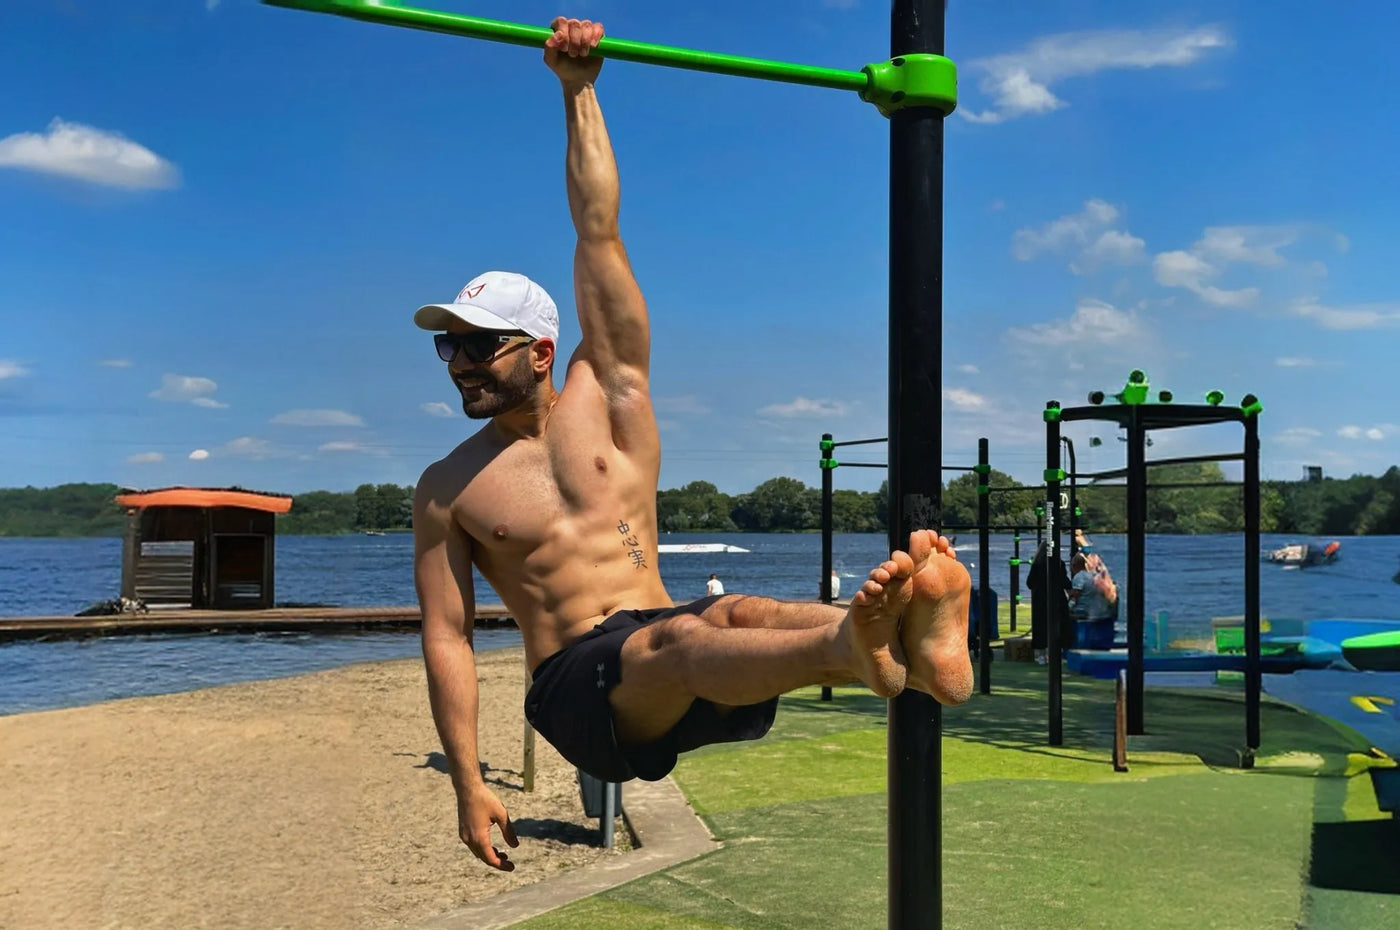
Why training without a gym builds real pull-up strength
You don't need cable machines or a lat pulldown station to build serious pulling strength. A pull-up bar, a set of rings, and a couple of bands give you everything required to train the major muscles of your back, biceps, shoulders, and core — simultaneously, in natural movement patterns that machines simply can't replicate.
Compound bodyweight pulling movements recruit more stabilisers, build functional joint strength, and scale to any level through leverage and band assistance. That's why athletes who train outdoors or at home consistently develop strong, transferable pulling strength.
- Zero commute, more consistency — removing the biggest barrier to regular practice
- Natural joint loading — rings and neutral grips reduce elbow and shoulder stress versus fixed-bar machines
- Infinite scaling — bands, leverage, and tempo allow training at exactly the right difficulty
- Compound carry-over — pulling movements train back, biceps, core, and grip simultaneously
The minimal kit that covers every progression
These three products cover every method in this guide — from your first assisted pull-up to dense volume sets with rings.
Four technique cues that immediately improve your pull-ups
Most people plateau not because they lack strength, but because small technique errors make every rep harder than it needs to be. Fix these four points and your pull-ups will feel noticeably lighter within two sessions.
- Active hang, not passive: Before you pull, retract your shoulder blades and press them down — imagine putting your shoulders into your back pockets. This activates the lats and protects the rotator cuff. A passive hang where the shoulders shrug up to the ears is the single most common beginner error.
- Elbows in, not flared: Keep elbows tracking slightly in toward your sides as you pull. Flaring wide shifts load off the lats and onto the biceps and shoulder tendons. Think "elbows to hips" rather than "elbows out to the sides."
- Full range — chin over the bar: Pull all the way up until your chin clears the bar, chest tall, core and glutes braced, feet together. Partial reps build partial strength. If you can't complete the top third, use a band — don't cut the range of motion.
- Quality before quantity: The moment technique degrades — hips swinging, neck craning, elbows flaring — the set is over. Stop one clean rep before form breaks. This is the fastest route to progress, not a sign of weakness.

Six progressions that build pull-up strength at home
These methods add quality pulling volume without a gym. Most training weeks should use two or three, rotated by day. They work for beginners building toward a first pull-up and intermediate athletes adding reps.

Two 6-week home programs
Pick one program and run it for 6 weeks on two or three non-consecutive days per week. Add light core work — hollow holds, dead bugs — at the end. Progress by reducing band thickness, increasing ring row angle, or extending eccentric duration.
Best for: beginners, anyone with just a bar and bands.
- Warm-up (6 min): Band pull-aparts 2×15, shoulder circles, wrist mobility
- Grease the groove: 1–3 very easy reps spread across the day
- Banded pull-ups: 4×4–8 strict, 90–120 sec rest between sets
- Eccentric pull-ups: 3×4 at 5–6 seconds lowering to dead hang
- Isometric hold: 2×8 seconds at your personal sticking point
- Optional finisher: Hollow hold 3×20–30 seconds
Best for: intermediate athletes with rings who want shoulder health alongside pull-up strength.
- Warm-up: Band pull-aparts 2×15, ring support hold 2×10 sec, shoulder circles
- Ring rows: 4×8–12 with 2-second controlled lower, 90 sec rest
- Neutral-grip ring pull-ups: 4×3–6 strict, full range, 2 min rest
- Eccentrics: 2×3 at 6 seconds down to dead hang
- Density finisher: 6 min EMOM — 2 clean ring rows per minute
- Optional accessory: Ring curls 3×10–12
Milestones to track at home
Tracking rep counts alone misses the bigger picture. These five milestones tell you exactly where you are and what to develop next. Hit each one before increasing difficulty.
| Milestone | Target standard | Level |
|---|---|---|
| Dead hang grip | 3 × 45 seconds, calm breathing throughout | Foundation |
| Ring rows | 4 × 12 at a challenging-but-clean body angle | Foundation |
| Eccentrics | 4 × 5 at 6 seconds controlled lower to dead hang | Developing |
| Banded pull-ups | 4 × 6 on a thinner band than last training cycle | Developing |
| Strict pull-ups | 1 clean rep → 3 reps → 5 reps | Goal |
How long does it take to increase pull-up strength?
Progress depends on starting level, consistency, sleep, and protein intake. These are realistic timelines based on 2–3 training sessions per week with progressive overload.
| Starting level | Realistic timeline | Key driver |
|---|---|---|
| 0 pull-ups | 6–12 weeks to first strict rep | Eccentric + banded volume |
| 1–3 pull-ups | 4–8 weeks to double reps | Density sets + technique |
| 5+ pull-ups | 3–6 weeks for noticeable rep increase | Progressive overload + deload |
Not sure what level you're at? Take the free Wild Dynamics calisthenics level test to get a precise starting point.
Building toward your first pull-up?
Our step-by-step beginner plan maps every progression — from your first dead hang to your first clean rep.
Read the first pull-up step-by-step plan →Common pull-up mistakes — and how to fix them
These five errors are responsible for the majority of pull-up plateaus, injuries, and slow progress. Each has a straightforward correction.
| Mistake | Why it matters | Fix |
|---|---|---|
| Shrugging shoulders | Bypasses the lats, loads the traps, and risks rotator cuff impingement | Practice active hangs — shoulder blades down and back before every rep |
| Half reps | Trains only part of the strength curve; top and bottom strength never develops | Use a band for assistance but always pull full range — chin over the bar |
| Using momentum (kipping) | Reduces lat load — the opposite of the goal when building pulling strength | Dead stop every rep; use eccentrics or bands to manage difficulty instead |
| Training to failure every set | Overloads tendons and the nervous system; reinforces technique breakdown | Stop 1–2 clean reps before failure on all but the final set |
| Too much volume too quickly | Tendons adapt slower than muscles — rapid jumps cause elbow and shoulder pain | Add one set or one rep per week maximum; deload every 4th week |
For a broader look at technique errors across all calisthenics movements, read the most common calisthenics mistakes for beginners.
Progress stalled? Fix for each sticking point
Pull-up plateaus usually happen at one specific position. Each has a direct cause and a direct solution.
Pull-up strength checklist
Use this as a weekly self-assessment. Every box should be ticked before increasing difficulty or volume.
- Active hang on every rep — shoulder blades retracted and depressed before you pull
- Full range of motion — chin over the bar, dead hang at the bottom
- 2–3 training sessions per week — non-consecutive days with adequate recovery
- Progressive overload in place — thinner band, steeper row angle, or slower eccentric each week
- Stopping before form breaks — 1–2 reps in reserve on all working sets
- Eating enough protein — at least 1.6g per kg of bodyweight daily
- Sleeping 7–9 hours — where most adaptation actually happens
- Warming up properly — band pull-aparts and shoulder circles before every session
Recovery: where pull-up strength is actually built
Training provides the stimulus. Recovery is when the adaptation happens. Sleep and nutrition often matter more for pull-up progress than the extra training day.
- Sleep 7–9 hours: Growth hormone and muscle protein synthesis peak during deep sleep. Under 6 hours consistently slows adaptation, especially in pulling movements that heavily load tendons.
- Protein 1.6–2.2g per kg bodyweight daily: Tendons and connective tissue need protein to adapt. Most people who train consistently but don't progress are under-eating protein, not under-training.
- Protect joints between sessions: Use resistance bands for warm-up, consider wrist wraps when volume increases, and follow the calisthenics warm-up guide before every session.
- Deload every 6–8 weeks: Reduce total sets by 40–50% for one week. Tendons adapt more slowly than muscle — deloading allows them to catch up, and often produces a noticeable strength jump the following week.
Related guides and training resources
Want faster pull-up progress?
Rings, resistance bands, and chalk make it easier to train safely, consistently, and with the right progression at every stage.
Explore the full calisthenics equipment range →Frequently asked questions
How many days per week should I train pull-ups at home?
Can I increase pull-up strength without a fixed bar?
Are resistance bands enough to get genuinely stronger at pull-ups?
How long until I notice real pull-up progress?
Should I do kipping pull-ups to increase my rep count?
My grip keeps failing before my lats. What can I do?
Should I train pull-ups to failure on every set?
My elbows hurt when I train pull-ups. What should I do?
Keep reps clean, breathe steadily, and stack small wins. Strong pull-ups are built anywhere — one honest rep at a time.


